Create a free website with hosting and domain in 2024 for beginners. Register for a free account, choose a domain extension, install WordPress, and add a secure certificate to your website. Customize your website’s appearance and start writing your own blog posts. It’s easy, free, and fun. Follow these steps and get your website up and running today. #FreeWebsite #WordPress #Beginners.
Introduction
Welcome to my channel! Today, we’ll embark on a journey to learn how to create a website using a free domain and free hosting. If you’re ready to kickstart your online presence, let’s dive right in!
Registering Your Domain and Account
To begin, head over to infinifree.com or infinifree.net and click on the registration button to create your account. Once you’ve registered, you’ll receive a verification email to validate your account.
| Step | Description |
|——|————-|
| 1. | Type in your email and password to register. |
| 2. | Accept the terms of service. |
| 3. | Verify your email by clicking on the link provided. |
Creating Your Free Website
After successfully setting up your account, it’s time to create your website. Follow the step-by-step instructions provided to get started.
Choosing Your Domain Extension
Select the domain extension for your website. As we are utilizing a free hosting service, we’ll be creating a subdomain for your site.
Pro tip: Before finalizing your domain extension, ensure that it is available for use.
| Extension | Availability |
|———–|————–|
| .com | Available |
| .net | Available |
Installing WordPress
Now, let’s install WordPress on your hosting dashboard to start building your website.
Selecting the Software
Navigate to the software installer and choose WordPress for installation. Customize your settings and proceed with the installation process.
Note: Ensure that HTTPS is selected for a secure connection and enter your blog name and description.
| Username | Password | Blog Name |
|———-|———-|———–|
| simple | ******** | Simple Way |
Activating Secure Connection
To provide a secure connection for your website, install an SSL certificate. This will ensure your website is protected and trustworthy for visitors.
Please note: Allow up to an hour for the DNS propagation.
| Status | Action |
|—————–|—————————–|
| Not Ready | Setup CNAME Record |
| Ready | Request Certificate |
| Error | Create a New CNAME Record |
| Successfully Installed | Verify SSL Certificate |
Customizing Your Website
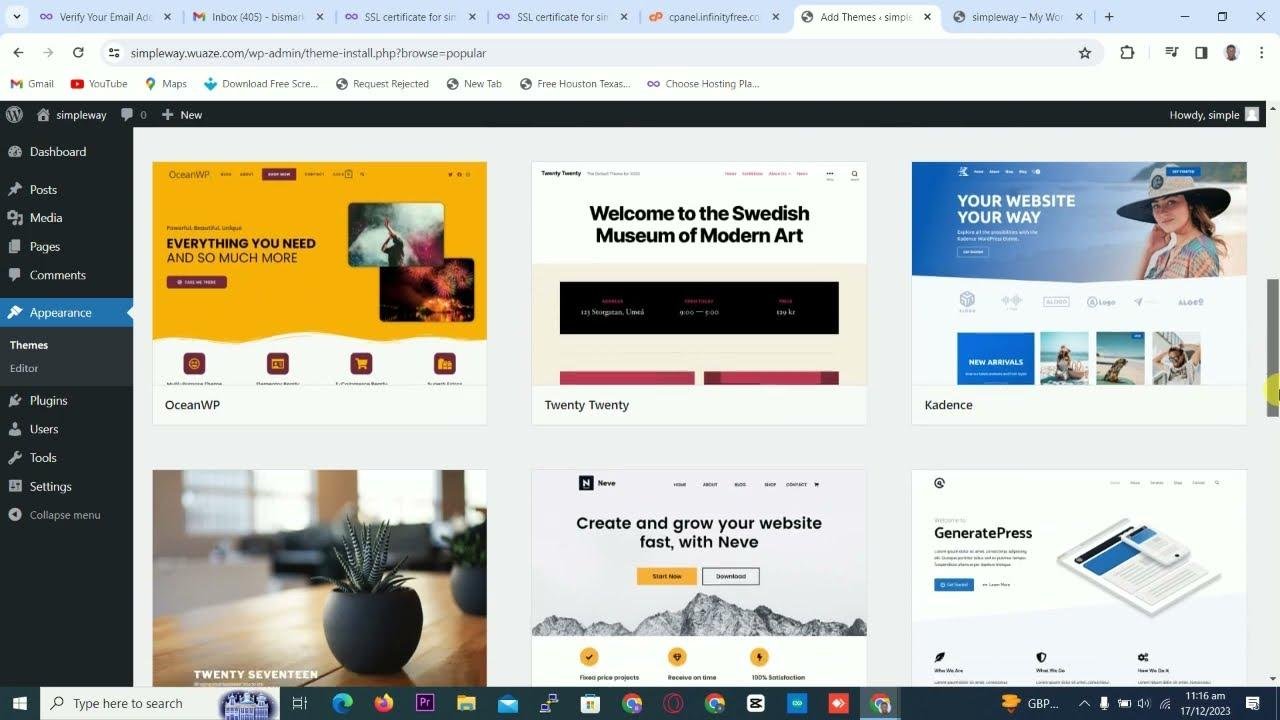
With WordPress installed, you can now start customizing your website by selecting and activating the desired theme and plugins.
Theme Selection
Choose the theme that best represents your website and activate it for a visually appealing design.
| Theme | Status |
|—————|———–|
| Simple & Clean| Installed |
Don’t hesitate to modify your website with relevant content and images to create an engaging user experience.
Creating and Publishing Content
Finally, begin creating content for your website by writing and publishing your posts. Personalize your website with unique content and images to attract and engage your audience.
Click here for a demo on creating and customizing your posts.
Conclusion
Congrats on successfully creating your free WordPress website with hosting and domain! Take your time to explore all the available features and make your website uniquely yours. If you found this tutorial helpful, don’t forget to subscribe to my channel, share, and leave a comment. Thank you for joining me on this journey!
Key Takeaways
- Creating a free website with WordPress is an excellent way to establish your online presence.
- Selecting the right domain extension and SSL certificate is crucial for securing your website.
FAQ
Q: Can I upgrade to a custom domain and premium hosting later on?
A:* Yes, you can upgrade your hosting plan and domain to a premium one in the future as your website grows.
Thank you for reading through this article and learning how to create a free WordPress website. If you have any further questions, feel free to reach out and I’ll be happy to assist you! 🚀


